
 EN
EN
Planning a network infrastructure upgrade for a growing office or campus environment is rarely as simple as buying the next available switch off the shelf. One of the most critical — and frequently underestimated — elements of that planning process is determining the right switch port density. Get it wrong, and you either over-provision hardware that sits idle for years or, far worse, you find yourself scrambling for additional switches mid-deployment because you ran out of available ports before the build was even complete. Understanding how to calculate the required switch port density accurately is the foundation of a scalable, cost-effective network design.
In enterprise and campus environments, the stakes are especially high. You are not just connecting desktop computers anymore — you are connecting IP phones, wireless access points, surveillance cameras, IoT sensors, building management systems, and a growing fleet of PoE-powered devices. Each of these endpoints demands a dedicated port, and the total count adds up faster than most IT planners expect. This article walks through the structured methodology for calculating switch port density, the key variables that influence your final port count, and how to align that calculation with real-world growth projections so your investment holds value for years to come.
Understanding Switch Port Density in Enterprise Network Design
What Switch Port Density Actually Means
Switch port density refers to the total number of active ports available on a network switch, or across a group of switches serving a defined network segment. In a simple desktop switch, this number might be 8 or 16. In an enterprise-class access layer switch, it typically ranges from 24 to 48 ports per unit. When you are designing a multi-floor office building or a distributed campus network, the total switch port density you deploy must account for every active endpoint across every segment of your infrastructure.
The concept matters because modern enterprise networks are no longer built purely on predictable, static endpoints. A single floor in a corporate office might have 30 workstations, 15 IP phones, 8 access points, and 4 networked printers. That is already 57 ports before you account for any PoE-powered building systems or room booking terminals. Failing to calculate switch port density with that level of granularity leads to premature port exhaustion — a scenario that forces costly emergency upgrades precisely when your team can least afford the disruption.
Why Growing Networks Require a Different Calculation Approach
Static networks with fixed user populations are easy to plan. Growing networks — expanding offices, multi-tenant campuses, or organizations undergoing digital transformation — require a fundamentally different approach to switch port density planning. The primary difference is that you are not just solving today's port count; you are building headroom for where the network will be in three to five years.
This means your calculation must factor in anticipated headcount growth, planned technology deployments, and the steady increase in per-user device count that organizations consistently experience. When employees use both a desktop and a laptop dock, when meeting rooms require dedicated AV endpoints, and when smart building systems consume multiple ports per floor, a calculation built only on today's snapshot will fail well before its intended end-of-life. Planning switch port density with structured growth buffers is not over-engineering — it is fundamental discipline.
The Step-by-Step Method for Calculating Switch Port Density
Step One — Complete the Full Endpoint Inventory
Every accurate switch port density calculation begins with a comprehensive endpoint inventory. This means cataloguing every device that will require a wired network connection in each physical zone you are designing for. Separate your count into categories: workstations and desktops, laptop docking stations, IP phones, wireless access points, networked printers and MFDs, IP cameras, PoE-powered devices such as access control panels, digital signage, and any smart building automation endpoints.
Many planners make the mistake of only counting people, then estimating one port per person. That heuristic is dangerously outdated. In a modern office environment, the average number of networked endpoints per employee can range from 2.5 to 4, depending on the technology stack in use. A thorough endpoint inventory, broken down by floor or zone, gives you the concrete baseline from which all other switch port density calculations will flow.
Step Two — Apply the Growth Projection Multiplier
Once you have your baseline port count, you need to apply a forward-looking growth multiplier. The standard practice in enterprise network planning is to add a minimum of 20 to 30 percent headroom to your current endpoint count for organic growth. For organizations in active expansion phases — opening new floors, onboarding large project teams, or rolling out new IoT infrastructure — that buffer should increase to 40 or even 50 percent.
The reasoning is straightforward: switching hardware has a practical lifecycle of five to seven years in most enterprise environments. If your network design provides exactly the right switch port density for today's needs, you will be forced to add switches, reconfigure your distribution layer, and revisit your cabling plan within two to three years. Building in that growth buffer upfront is almost always cheaper than a mid-lifecycle infrastructure expansion. The right switch port density calculation is therefore always a projection, not a snapshot.
Step Three — Account for PoE Budget and Port Type Requirements
Port count is only one dimension of switch port density planning. The other critical dimension is PoE (Power over Ethernet) budget and port capability distribution. In a modern office or campus deployment, a significant portion of your endpoints — access points, IP phones, cameras, and access control readers — will require PoE power delivery. Each switch in your design has a finite total PoE wattage budget, and this constraint can force you to add more switches even when raw port counts appear sufficient.
For example, a 48-port switch with a 370-watt PoE budget can comfortably power a mix of standard PoE devices. But if your floor plan includes several high-wattage access points requiring 25 to 30 watts each, alongside a full row of PoE phones and a set of IP cameras, your PoE budget can be exhausted well before all 48 ports are utilized. Your switch port density calculation must therefore include a per-port power requirement estimate for every PoE endpoint — not just the raw port count. This dual-axis approach prevents the common scenario where a network appears to have enough ports on paper but runs out of PoE headroom in practice.
Matching Switch Port Density to Your Network Architecture
Access Layer Density Planning
In a structured campus or multi-floor office network, the access layer is where switch port density decisions have the most direct impact on day-to-day operations. Access layer switches connect directly to end devices, so their port count directly determines how many endpoints can be served from each wiring closet or telecommunications room. The standard enterprise access switch format — 24 or 48 ports — is designed precisely to serve these high-density edge deployments.
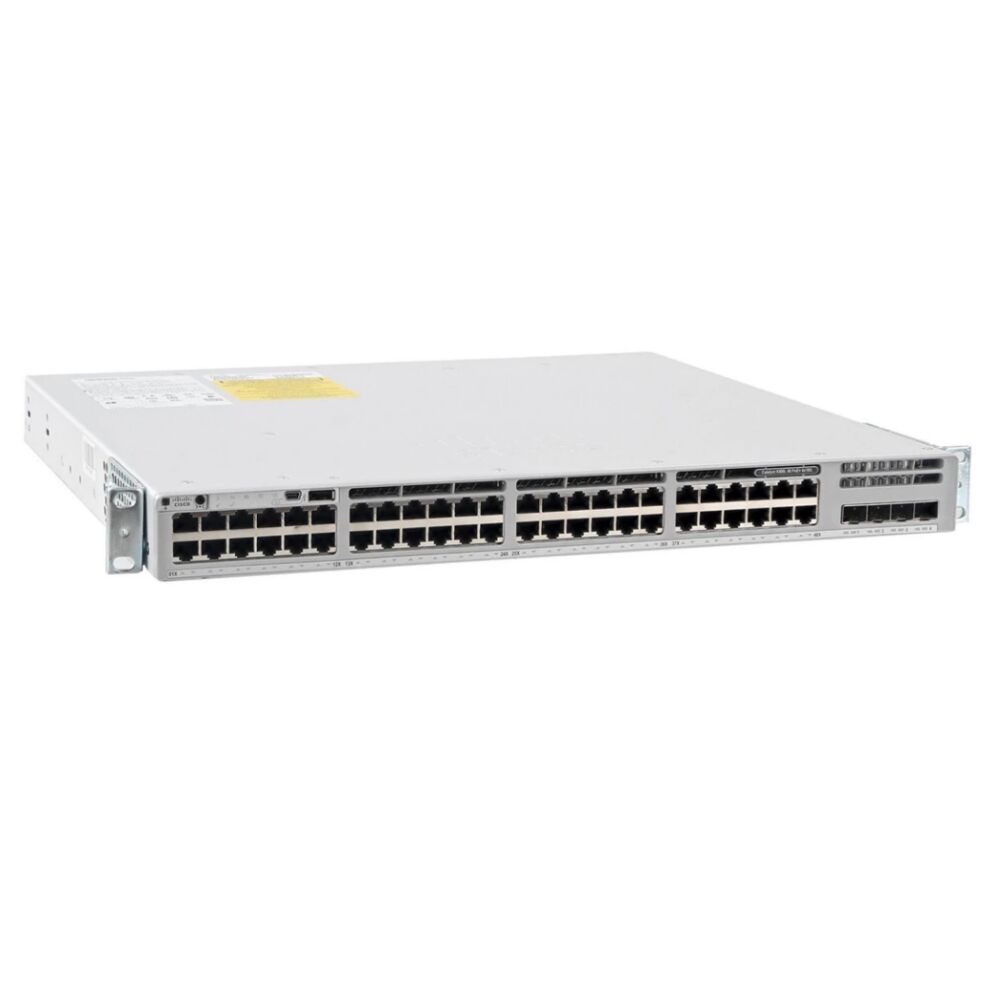
A 48-port access switch is generally the preferred choice for high-density floors because it minimizes the number of switches needed per zone, reduces the number of uplinks required to the distribution layer, and consolidates your PoE budget into fewer, more manageable units. When you select a platform like the switch port density-optimized C9300L-48P-4G-E, you get 48 PoE-capable Gigabit ports in a stackable form factor that directly addresses the growth capacity challenge — allowing multiple units to be stacked and managed as a single logical switch, which makes expanding your total port count straightforward as your endpoint inventory grows.
Access layer planning should also account for the physical layout of your floor or campus zone. Each switch should serve a logical grouping of endpoints within cable-run distance — typically within the 90-meter structured cabling limit for copper. Designing around physical zones rather than simply calculating a total floor port count ensures that your switch port density deployment is both operationally logical and scalable.
Distribution and Core Layer Considerations
While switch port density at the access layer addresses the endpoint connection challenge, the distribution and core layers introduce a different set of density considerations. At these layers, port density refers primarily to uplink port count and inter-switch connection capacity. Your distribution switches need sufficient ports to aggregate uplinks from all access layer switches in their zone without creating bottlenecks.
For growing campus networks, the distribution layer must be designed with uplink port capacity that reflects not just today's access switch count, but the projected access switch count at full build-out. If you are deploying ten access switches today with plans to expand to eighteen within three years, your distribution switches need the uplink port headroom to support that expansion without replacement. This layer-by-layer switch port density analysis is what separates a truly scalable network design from one that creates cascading upgrade requirements as the organization grows.
Common Calculation Mistakes and How to Avoid Them
Ignoring the Device-per-User Multiplier
The single most common error in switch port density planning is using headcount as the sole basis for the port calculation. In practice, every modern worker generates multiple networked endpoints. When you consider that a single desk might have a workstation, a VoIP phone, a video conferencing unit, and a laptop dock — all requiring separate wired connections — the per-person port count quickly exceeds two or three. Organizations that skip this multiplier consistently end up with insufficient switch port density at the access layer within the first year of a new deployment.
The correct approach is to define endpoint categories, assign a quantity per user or per workspace, then multiply by the total workspace count per zone. This category-based inventory method produces a far more reliable baseline than any headcount heuristic. It also makes your calculation more defensible when presenting network infrastructure budget requests to organizational stakeholders.
Failing to Reserve Ports for Infrastructure Endpoints
Infrastructure endpoints — access points, cameras, door controllers, environmental sensors — are often omitted from the initial switch port density calculation because they are managed by different teams or procured on different budget cycles. This is a planning mistake with real operational consequences. These devices occupy ports on exactly the same access switches that serve end users, and they frequently represent 20 to 35 percent of the total port count in a modern smart building or enterprise campus deployment.
Infrastructure endpoints also tend to have higher PoE power requirements than standard devices, which brings you back to the PoE budget dimension discussed earlier. A complete and accurate switch port density calculation must integrate infrastructure endpoint counts from facilities management, physical security, and AV systems teams alongside the IT endpoint inventory. Cross-functional coordination at the planning stage is far less expensive than re-engineering the access layer after deployment.
Translating Your Port Density Calculation Into a Hardware Specification
Determining the Right Switch Count Per Zone
Once you have a validated port count for each floor or zone — including baseline endpoints, growth buffer, and infrastructure devices — you can calculate the number of switches required. Divide your total required port count for each zone by the effective port count per switch. The effective port count is the total physical ports minus the uplink ports reserved for connecting to the distribution layer — typically two to four ports on a standard 48-port enterprise access switch.
So for a zone requiring 120 active endpoint ports, with 48-port switches reserving 4 uplink ports each, your effective per-switch endpoint capacity is 44 ports. You would need a minimum of three switches to serve that zone, which gives you 132 effective ports against your 120-port requirement — a reasonable operational buffer. This structured calculation method ensures that your switch port density deployment is neither wastefully over-provisioned nor dangerously under-designed for growth.
Validating Against PoE Budget and Uplink Capacity
After determining the switch count, validate each switch against two additional constraints. First, total the estimated PoE draw for all devices connected to each switch and confirm that the aggregate does not exceed the switch's rated PoE budget. If it does, either redistribute endpoints across an additional switch or select a higher-wattage PoE platform for that zone. Second, confirm that your uplink port count and speed — typically 1G or 10G — provides sufficient bandwidth for the aggregated traffic from all connected endpoints during peak usage.
This three-axis validation — port count, PoE budget, and uplink capacity — is the complete methodology for translating a switch port density calculation into a concrete hardware specification. Skipping any one of the three axes is the most common reason that otherwise well-designed networks require premature and costly upgrades. The goal is a deployment that remains operationally comfortable through the full intended lifecycle of the hardware — typically five to seven years in enterprise environments.
FAQ
How much growth headroom should I add to my switch port density calculation?
For most stable enterprise environments, a 20 to 30 percent headroom buffer added to your current endpoint baseline is considered standard practice. For organizations in active expansion — adding floors, new business units, or large-scale IoT deployments — increasing that buffer to 40 or 50 percent is advisable. The correct growth buffer depends on your organization's three to five year headcount and technology roadmap, and it should be reviewed with department heads and facilities management before finalizing your switch port density specification.
Does PoE requirement affect my switch port density planning?
Yes, significantly. Switch port density planning has two dimensions: raw port count and PoE power budget. Even if a switch has sufficient physical ports for your endpoint count, it may not have sufficient aggregate PoE wattage to power all PoE devices simultaneously. You must calculate the estimated PoE draw for every powered device on each switch and compare that total against the switch's rated PoE budget. If the draw exceeds the budget, you need to either add a switch or select a higher-capacity PoE platform for that zone.
Can I mix 24-port and 48-port switches in the same access layer deployment?
Yes, mixing port densities across zones is a common and practical approach. Smaller zones, server rooms, or low-density floors may be well served by 24-port switches, while high-density open-plan floors or lab environments may require 48-port access switches. The key is to calculate switch port density requirements independently for each zone rather than applying a uniform standard across the entire building. This zone-by-zone approach prevents both over-provisioning in light-use areas and under-provisioning in high-demand areas.
How does switch stacking affect port density planning for growing networks?
Switch stacking is one of the most effective tools for managing switch port density growth because it allows you to add physical switches to a stack and manage them as a single logical unit. This means you can start a zone with one or two switches and expand to a full stack of eight or more units without changing your management architecture, VLAN configuration, or uplink design. For growing campus or office networks, deploying stackable switches from the outset — even if you initially only install two units — provides a clean, cost-efficient expansion path that avoids the disruptive reconfiguration that would otherwise be required when port demand outgrows a non-stackable fixed-configuration switch.
Table of Contents
- Understanding Switch Port Density in Enterprise Network Design
- The Step-by-Step Method for Calculating Switch Port Density
- Matching Switch Port Density to Your Network Architecture
- Common Calculation Mistakes and How to Avoid Them
- Translating Your Port Density Calculation Into a Hardware Specification
- FAQ